Install on Linux (Standalone Splunk Environment)
Install on Linux (Standalone Splunk Environment)
Follow the steps below to install the UXM Monitoring solution On-Premise in a Splunk standalone environment, the software can be downloaded from here: Download server software.
The standalone Splunk Environment can handle up to 20.000 endpoint agents and 4 concurrent dashboard users, please use a distributed environment if more endpoints or concurrent users are needed.
Prerequisities
| OS/Hardware Requirements |
|---|
| Operating System |
| Processor |
| RAM |
| Storage |
| Internet |
| Version/Ports Requirements |
|---|
| UX Monitoring Splunk App |
| Splunk |
| Firewall |
- 80
- 443 (HTTPs certificate required or LetsEncrypt can be used on Linux)
- 8000 (Splunk Web interface), 8089 (Splunk REST API / Data Receiver) |
Download Splunk
Download newest Splunk from https://www.splunk.com/en_us/download/splunk-enterprise.html or from our server software download site, if you don't want to create a Splunk profile.
Ubuntu:
wget https://download.uxmapp.com/splunk/splunk-9.X.X-yyyyyyyyyyyy-linux-2.6-amd64.deb
Red Hat:
curl https://download.uxmapp.com/splunk/splunk-9.X.X-yyyyyyyyyyyy-linux-2.6-x86\_64.rpm -o splunk-9.X.X-yyyyyyyyyyyy-linux-2.6-x86_64.rpm
Install Splunk
Ubuntu:
sudo dpkg -i splunk-9.X.X-yyyyyyyyyyyy-linux-2.6-amd64.deb
Red Hat:
chmod 744 splunk-9.X.X-yyyyyyyyyyyy-linux-2.6-x86_64.rpm
sudo rpm -i splunk-9.X.X-yyyyyyyyyyyy-linux-2.6-x86_64.rpm
Other Linux distributions:
See http://docs.splunk.com/Documentation/Splunk/latest/Installation/InstallonLinux
Note: Default installation directory is /opt/splunk
2. Make Splunk auto-start
Make Splunk auto-start when server is rebooted. You will be asked to create an user and password for the admin account.
sudo /opt/splunk/bin/splunk enable boot-start -systemd-managed 1 -user splunk --accept-license
3. Start Splunk
Start the Splunk service.
sudo systemctl start Splunkd.service
4. Login to Splunk
Login to http://fqdn\_or\_ip:8000/, default login is admin with the password created when starting splunk for the first time.
See "Splunk - Configure HTTPs" for how to setup HTTPs.
Create directories
Path where raw data is stored, you will have to change splunk config to use the path afterwards.
sudo mkdir -p /mnt/disks/data/indexes
sudo chown -R splunk:splunk /mnt/disks/data/indexes
Path to where video/screenshots and log files are stored.
sudo mkdir -p /mnt/disks/data/storage
sudo chown -R splunk:splunk /mnt/disks/data/storage
Optional: See "Splunk - Change data index path" for how to change where data is stored.
Install RabbitMQ
Install RabbitMQ following the official guides:
Ubuntu/Debian: https://www.rabbitmq.com/install-debian.html
Lock the package in Ubuntu, all features have to be enabled before upgrading when performing major upgrades from 11.x to 12.x, etc.
sudo apt-mark hold rabbitmq-server
RedHat / CentOS: https://www.rabbitmq.com/install-rpm.html
RedHat 7 comes with old RabbitMQ 3.3.5 which UXM supports, can be installed with:
sudo yum install erlang rabbitmq-server
Enable management web interface and add uxmapp user.
sudo rabbitmq-plugins enable rabbitmq\_management
sudo service rabbitmq-server start
sudo rabbitmqctl add\_user uxmapp GeneratedPassword
sudo rabbitmqctl set\_user\_tags uxmapp monitoring
sudo rabbitmqctl add\_vhost /uxmapp/
sudo rabbitmqctl set\_permissions -p /uxmapp/ uxmapp ".\*" ".\*" ".\*"
sudo rabbitmqctl delete\_user guest
Optional: Install NGINX (For UXM SaaS hosting)
Install nginx-light, example script below for Ubuntu with certbot:
See https://certbot.eff.org/instructions?ws=nginx&os=ubuntufocal for how to setup Certbot
sudo apt-get install nginx-light
sudo certbot --nginx -d customername.uxmapp.com --email support@uxmapp.com --agree-tos
Install UXM App
The UXM Splunk App can be downloaded from here: Download server software
1. Upload app through Splunk Apps manager
Login to splunk and goto the Manage Apps page.
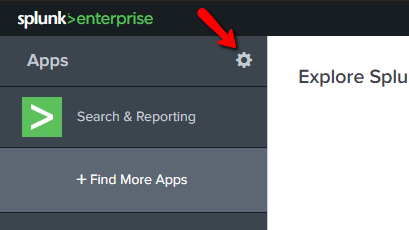
Select "Install app from file".
![]()
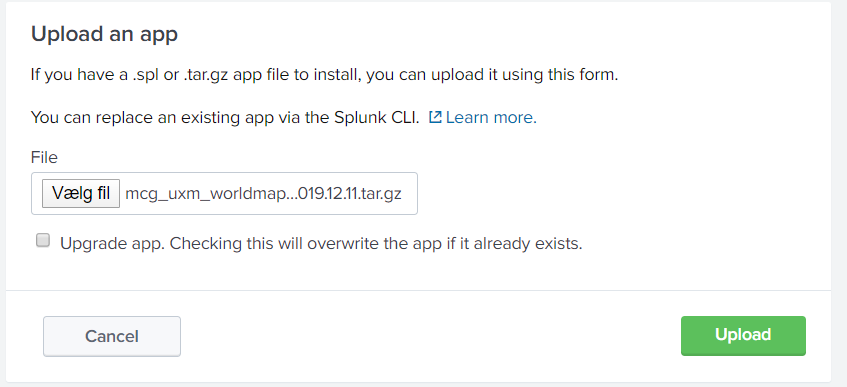
Select the uxmapp_YYYY.MM.DD.tar.gz file and press Upload. (Upgrade app is only needed when app already exists and you want to upgrade it)
UXM distributes it's dashboards and settings through appfolder/default, all changes you do inside Splunk to dashboards and config is stored under appfolder/local.
Local copies of dashboards can exist /opt/splunk/etc/apps/uxmapp/local/data/ui/views if you upgrade the app, if dashboards doesn't work or isn't upgraded then please check and delete those files and restart the splunk server.
Select "Setup Later" or "Restart Later" if asked, the standalone_000_setup_app.py script have to be executed first before restarting Splunk or setting up the app.
2. Setup KVStores, Roles and WSGI user
Goto Settings -> Data Inputs -> Scripts and enable the script setup/standalone_000_setup_app.py. (The script creates default KVStores entries, Splunk roles and Splunk user)
You can also follow this guide to "Setup Search Head Manually" if you prefer to configure Splunk manually.
Logs from the execution can be viewed via the SPL:
index="\_internal" source="\*\_setup\_standalone\_000\_setup\_app\*"
HTTP Event Collector (HEC) token and uxmapp_wsgi user+password is automatically stored under /opt/splunk/etc/apps/uxmapp/local/setup.conf
3. Configure app through Splunk Apps manager
Select "Set up" to configure the UXM app.
Save the generated Agent Key for later when deploying the UXM Desktop agent to endpoints. See Deploying Desktop Agents
Enter RabbitMQ password configured.
Enter KVStore, HTTP Event Collector settings if you didn't execute the standalone_000_setup_app script.
Open /en-US/debug/refresh and Press refresh, if KVStore or HTTP Event Collector fields wasn't filled out by standalone_000_setup_app script, Splunk could be caching the changes to the local/setup.conf file.
Goto license tab and apply the license supplied by your sales contact, license is required to save and use UXM.
Leave rest of values as default and press save.
The page will redirect to the UXM Enterprise dashboard when done.
4. Optional: Replace welcome screen
Can be done manually by updating the web.conf file and uploading the image. http://docs.splunk.com/Documentation/Splunk/latest/Admin/Webconf
Install Visualization Apps
Install the following visualization apps, they can be found under the download page. No restart of Splunk is required afterwards.
- uxmapp_waterfall_*.tar.gz
- uxmapp_worldmap_*.tar.gz
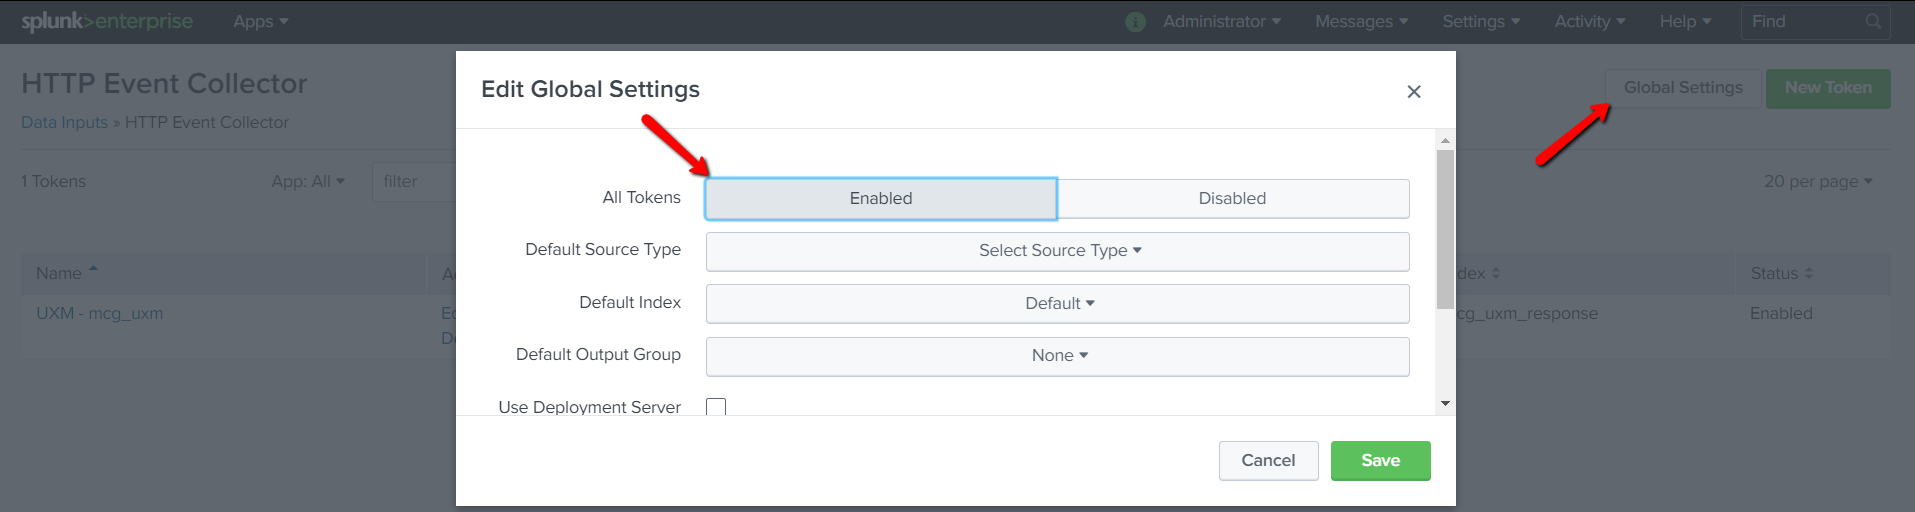
Enable HTTP Event Collector in Splunk (HEC)
Goto Settings -> Data Inputs -> HTTP Event Collector select Global Settings and select Enabled for All Tokens. Press Save to enable the HEC server.
Check permissions on app
Open Apps -> Manage App and select Permissions for uxmapp.
Ensure the auto generated uxmapp user role have read permissions to the app and that uxmpapp admin role have read/write permissions.
Enable HTTPs and Restart Splunk
Select Settings -> Server Settings and General Settings.
Set Enable SSL (HTTPS) to Yes and press
Select Settings -> Server Controls and Restart Splunk to activate the indexes, uxmapp and HTTPs.
You will have to access Splunk via https://fqdn_or_ip:8000/ after it has restarted.
Activate WSGI socket for receiving UXM Web/Desktop data to RabbitMQ queue
Install Python3 environment and activate for NGINX/WSGI data receiver.
Ubuntu:
sudo apt-get -y install python3-pip
cd /opt/splunk/etc/apps/uxmapp/bin/setup

echo "Creating log directory at /var/log/uwsgi/"
sudo mkdir -p /var/log/uwsgi/
sudo chown -R splunk:splunk /var/log/uwsgi/

echo "Creating python environment and activating uwsgi"
sudo pip3 install virtualenv
sudo /usr/local/bin/virtualenv -p python3 ../wsgi/
sudo chown -R splunk:splunk ../wsgi/
sudo -H -u splunk bash
cd /opt/splunk/etc/apps/uxmapp/bin/setup
source ../wsgi/bin/activate
pip install uwsgi six pycryptodome
deactivate
exit
Add WSGI data receiver as service that starts with the server
cd /opt/splunk/etc/apps/uxmapp/bin/wsgi/
sudo ln -s wsgi-uxm.template-large.ini wsgi-uxm.ini
sudo cp wsgi-uxm.template.service /etc/systemd/system/wsgi-uxm.service

# Check that uxmapp folder is correct in params: WorkingDirectory, Environment and ExecStart
sudo vi /etc/systemd/system/wsgi-uxm.service

sudo systemctl enable wsgi-uxm && sudo systemctl start wsgi-uxm
sudo systemctl status wsgi-uxm
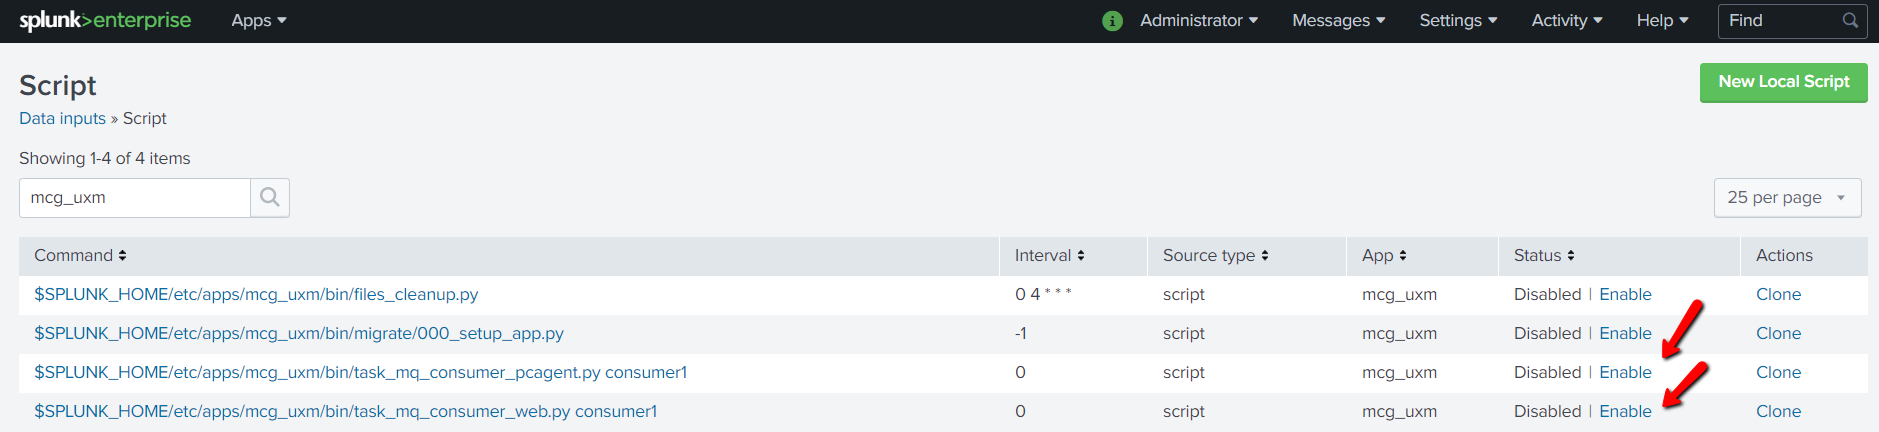
Enable Splunk scripts
Enable following Data Input script under Settings -> Data Input -> Scripts:
- check_license.py
- daily_maintenance.py
- task_generate_tags.py
- update_applications.py
- update_endpoint_groups.py
- update_kvstores.py
- task_mq_consumer_pcagent.py (consumer1 or new Multithreading task_mq_consumer_pcagent_mt.py if single consumer can't handle data received)
- task_mq_consumer_web.py
Endpoints for receiving data
We recommend for increased security that you setup HTTPs certificates. (Web agent also requires that valid HTTPs certificate is configured, because data is send directly from the users browser using the same HTTP/HTTPs security that monitored website has)
An Reverse Proxy is also recommended if data has to be received from outside the company network.
| Used for | Splunk endpoint | Reverse Proxy endpoint |
| Splunk Web | http://ip_or_fqdn:8000 / or https://fqdn:8000/ | https://fqdn/ |
| Desktop/Robot agent data receiving | bin\task_mq_consumer_pcagent.py reads from RabbitMQ queue. | https://fqdn/data/pcagent |
| NGINX / uWSGI adds to RabbitMQ queue | ||
| Web agent data receiving | bin\task_mq_consumer_web.py reads from RabbitMQ queue. | https://fqdn/data/browser |
| NGINX / uWSGI adds to RabbitMQ queue | ||
| Optional: Splunk HTTP Event Collector | ||
| (Has to be enabled first) | http://ip_or_fqn:8088/services/collector | https://fqdn/services/collector |
| Optional: Splunk Teams webhook | http://localhost:12031/webhook/teams | https://fqdn/webhook/teams |
Reverse Proxy with Lets Encrypt
See the guide here on how to setup a Reverse NGINX proxy with Lets Encrypt for HTTPs certificates.
Next steps
Optional Post Configuration
Splunk - Configure HTTPs
You can find more info about securing your Splunk installation at "About securing Splunk Enterprise with SSL" and "Secure Splunk Web with your own certificate".
NGINX/Lets Encrypt handles the HTTPs certificates, Splunks needs to run HTTPs as well, the default Splunk HTTPs certificates can be used or the generated ones.
Splunk - Change data index path
Stop splunk
sudo /opt/splunk/bin/splunk stop
Move Splunk data directory
sudo mv -v -T /opt/splunk/var/lib/splunk /mnt/disks/data/indexes
Edit /opt/splunk/etc/splunk-launch.conf to change the default location of data index files, this is where all raw data is placed, so it has to be on the 100+ GB drive.
sudo vi /opt/splunk/etc/splunk-launch.conf
update or add to en if SPLUNK_DB parameter doesn't exists:
By default, Splunk stores its indexes under SPLUNK_HOME in the
var/lib/splunk subdirectory. This can be overridden here:
SPLUNK_DB=/mnt/disks/data/indexes
Start splunk again
sudo runuser -l splunk -c '/opt/splunk/bin/splunk start'
Splunk - Configure LDAP / SAML
We recommend that you configure Splunk to use LDAP or SAML, see http://docs.splunk.com/Documentation/Splunk/latest/Security/ConfigureLDAPwithSplunkWeb for more information.
Linux - Setup ulimits and swappiness
ulimits
Increasing limit for open files is required on large Splunk installation, edit the limits.conf file for edit: /etc/security/limits.conf
Add the following lines:
root hard nofile 65535
root soft nofile 65535
splunk hard nofile 65535
splunk soft nofile 65535
And then add following line in the file: /etc/pam.d/common-session
session required pam_limits.so
Restart the server and validate that ulimits is increased.
sudo -i
su
ulimit -a
swappiness
To improve performance, please consider setting your swappiness setting to Zero:
sudo -i
su # to be superuser and make the changes.
For current session:
cat /proc/sys/vm/swappiness #check the current value, should be 0
echo 0 > /proc/sys/vm/swappiness #change for the current session
For all future session:
grep vm.swappiness /etc/sysctl.conf #check the current value
echo "vm.swappiness=0" >> /etc/sysctl.conf #change for all future sessions