Install on Linux (Distributed Splunk Environment)
Overview
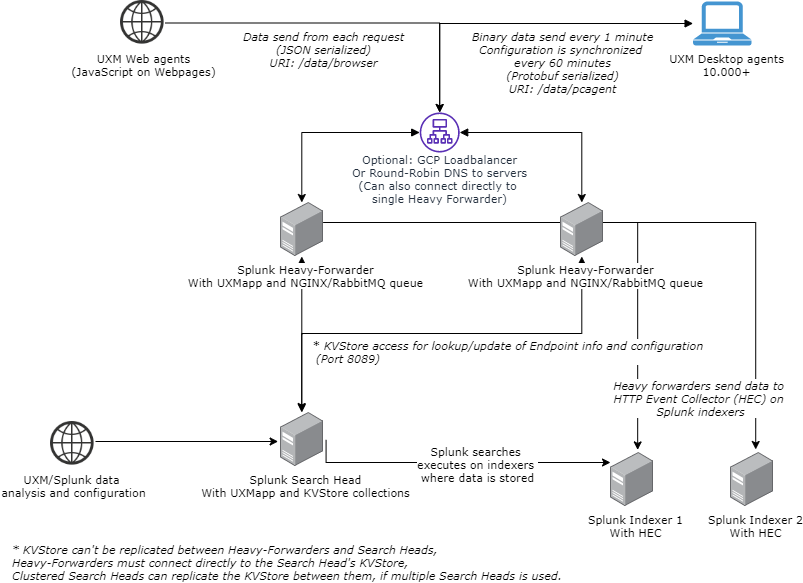
UXM is setup to handle 10.000+ Desktop agents and million of Web page requests per day.
The recommended architecture is to setup an Splunk Heavy-Forwarder with UXM (containing the NGINX/RabbitMQ queue) and send data via HTTP Event Collector (HEC) to the indexers.
Setup splunk indexers
Install indexer app
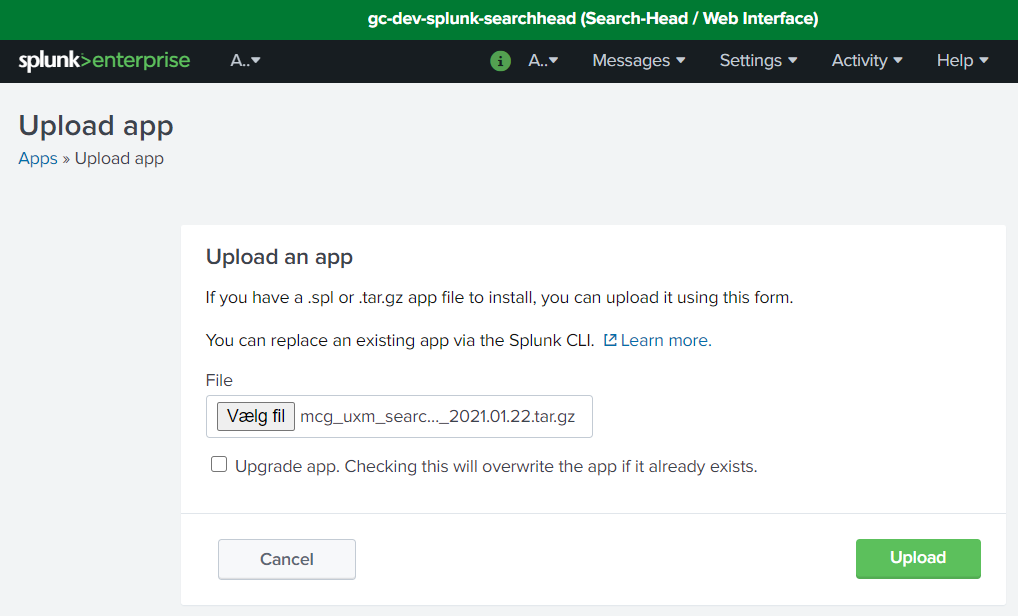
Install the app "uxmapp_indexer_YYYY.MM.DD.tar.gz" on the Splunk Indexers.
Installing the indexer app creates the following UXM indexes:
| Index name | Type | Description |
| uxmapp_response | Events | |
| uxmapp_sessiondata | Events | |
| uxmapp_metrics | Metrics | Metric store with high performance metrics for charts with limited dimentions. |
| uxmapp_metrics_rollup | Metrics | Hourly rollup of Metric for long term reporting and fastest performance. |
| uxmapp_confidential | Events | Confidential data that only a limited number of people can access and view. |
| uxmapp_si_hourly | ||
| Events | For hourly summary index rollups. | |
| uxmapp_si_quarterly | ||
| Events | For quarterly summary index rollups. |
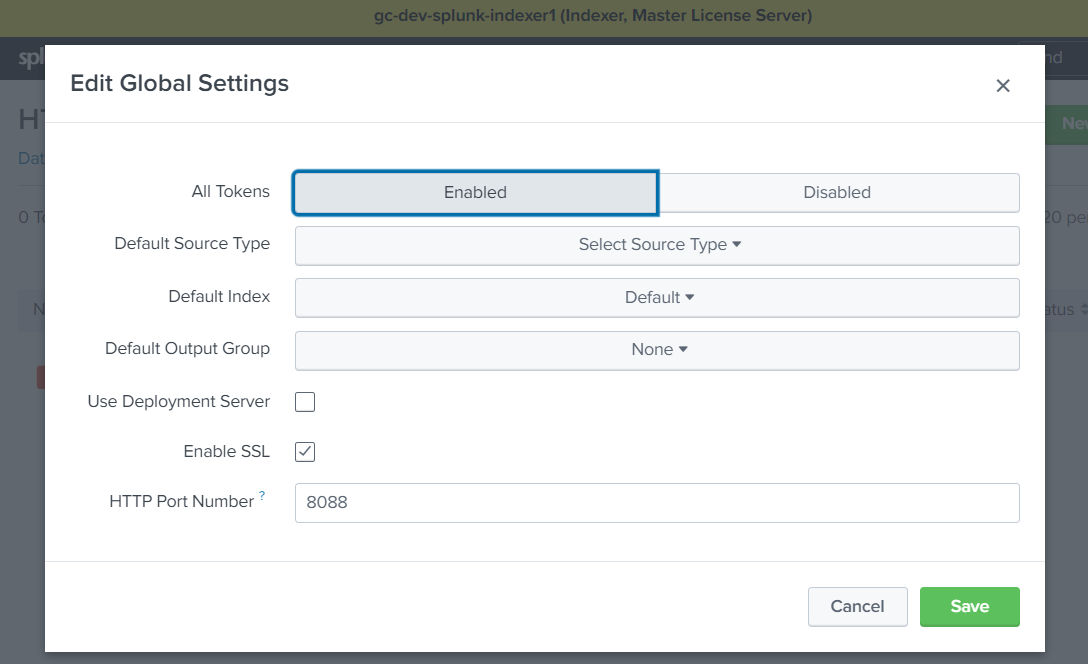
Activate HTTP Event Collector
Activate the HTTP Event Collector (HEC) on the indexers that should receive the UXM data.
This is done under Settings -> Data Inputs -> HTTP Event Collector -> Global Settings
Write down the FQDN/IP of the Indexer, if SSL is enabled and Port number (Default 8088), these settings will be used later when setting up the Heavy Forwarder.
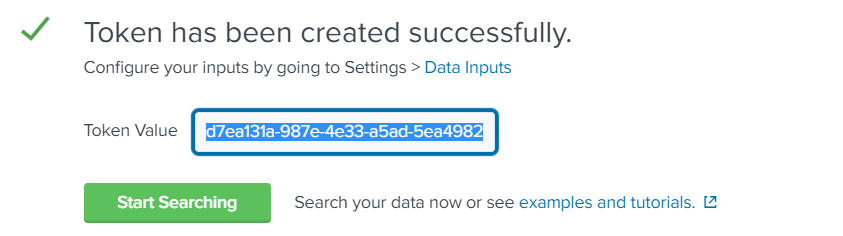
Create HTTP Event Collector for receiving UXM data
Create new HTTP Event Collector and call it "UXM - uxmapp", indexer acknowlegement has to be disabled.
Select:
- Source type: automatic
- App context: UXM Indexers (uxmapp_indexer)
- Indexes: Select the 4 indexes uxmapp_confidential, uxmapp_metrics, uxmapp_response, uxmapp_sessiondata
- Default Index: uxmapp_response
Press Preview and Submit, write down the token value, the settings will be used when configuring the Heavy Forwarder and Search Head.
Setup Splunk Search Head
The splunk search head contains dashboards and data models and is where the user analyses the UXM data.
Please note that multiple scheduled searches which creates summary indexes are created by the UXM app, these requires that you follow Splunk best practices and forwards all data from the Search Heads to the Indexers.
Install app
Install the following apps on the Search Head. You can skip the restart untill later.
- uxmapp_searchhead_YYYY.MM.DD.tar.gz
- uxmapp_waterfall_YYYY.MM.DD.tar.gz
- uxmapp_worldmap_YYYY.MM.DD.tar.gz
Goto Settings -> Data Inputs -> Scripts and enable the script setup/distributed_searchhead_000_setup_app.py. (The script creates default KVStores entries, Splunk roles and Splunk user that allows Heavy Forwarders to access the KVStore on the Search Head)
You can also follow this guide to "Setup Search Head Manually" if you prefer to configure Splunk manually.

You can view the output of the script by running the following Splunk search:
index="\_internal" source="/opt/splunk/var/log/splunk/uxmapp\_setup\_distributed\_searchhead\_000\_setup\_app.log"
There will be 2 new roles after the script has executed called: uxmapp_user and uxmapp_admin:
And a user called uxmapp_wsgi, reset the password for the user and disable that password change is required on next login, store the password it will be used later when setting up the Heavy Forwarder.
Setup/verify permissions for app
Goto Apps -> Manage Apps and click permissions on the uxmapp app.
Add read permissions for the newly created uxmapp_user and read+write permissions for the uxmapp_admin user.
Setup/verify UXM configuration
Open the UXM app, it will ask you to configure it, enter HTTP Event Collector Hostname and Token, leave rest of values as default and press save.
Enable Splunk batch processing scripts
Enable following Data Input script under Settings -> Data Input -> Scripts:
- daily_maintenance.py
- task_generate_tags.py
- update_applications.py
- update_endpoint_groups.py
- update_kvstores.py
The Splunk Search Head needs to be restarted afterwards when all configuration is done.
Setup Heavy Forwarder
The Splunk Heavy Forwarder (HF) receives the data and processes it according to the configuration on the Splunk Search Head KVStores. It also sends out configuration to the UXM Desktop agents.
NGINX and RabbitMQ is needed to control the data retrieval and queuing to avoid overloading the HF.
Setup RabbitMQ
Login to the heavy forwarder and install RabbitMQ following the official guides:
Ubuntu/Debian: https://www.rabbitmq.com/install-debian.html
Lock the package in Ubuntu, all features have to be enabled before upgrading when performing major upgrades from 11.x to 12.x, etc.
sudo apt-mark hold rabbitmq-server
RedHat / CentOS: https://www.rabbitmq.com/install-rpm.html
RedHat 7 comes with old RabbitMQ 3.3.5 which UXM supports, can be installed with:
sudo yum install erlang rabbitmq-server
After installation enable the management web interface and add the UXM user, remember to generate a password and replace it with the "{GeneratedPassword}".
sudo rabbitmq-plugins enable rabbitmq\_management
sudo service rabbitmq-server start
sudo rabbitmqctl add\_user uxmapp \{GeneratedPassword\}
sudo rabbitmqctl set\_user\_tags uxmapp monitoring
sudo rabbitmqctl add\_vhost /uxmapp/
sudo rabbitmqctl set\_permissions -p /uxmapp/ uxmapp ".\*" ".\*" ".\*"
sudo rabbitmqctl delete\_user guest
Install app
Install the app "uxmapp_heavyforwarder_YYYY.MM.DD.tar.gz" on the Splunk Heavy Forwarder. You can skip the restart untill later.
Configure app
Open the UXM app, it will ask you to configure it, use same Agent Key as the Search Head, enter KVStore, HTTP Event Collector and RabbitMQ settings, leave rest of values as default and press save.
Storage path is for UXM Desktop agent log files and UXM Robot agent video, screenshot and log results, can be skipped.
Save the generated Agent Key for later when deploying the UXM Desktop agent to endpoints. See Deploying Desktop Agents
Save and restart Splunk.
Setup uWSGI
Install Python3 and activate the uWSGI environment by running the following commands
Ubuntu prerequisites:
# Python 3
echo "Installing Python3 and uWSGI plugin"
sudo apt-get update
sudo apt install python3 python3-pip uwsgi-plugin-python3
Redhat prerequisites:
# Python 3
echo "Installing Python3 and uWSGI plugin"
sudo yum install python3 python3-pip python3-devel uwsgi-plugin-python3 gcc
Setup uWSGI environment using non root user:
cd /opt/splunk/etc/apps/uxmapp/bin/setup
echo "Creating log directory at /var/log/uwsgi/"
sudo mkdir -p /var/log/uwsgi/
sudo chown -R splunk:splunk /var/log/uwsgi/
echo "Creating python environment and activating uwsgi"
sudo pip3 install virtualenv
sudo /usr/local/bin/virtualenv -p python3 ../wsgi/
sudo chown -R splunk:splunk ../wsgi/
sudo -H -u splunk bash
cd /opt/splunk/etc/apps/uxmapp/bin/setup
ln -s ../wsgi/wsgi-uxm.template.ini ../wsgi/wsgi-uxm.ini
source ../wsgi/bin/activate
pip install uwsgi six pycryptodome
deactivate
exit
echo "Auto-start uWSGI on boot"
sudo cp ../wsgi/wsgi-uxm.template.service /etc/systemd/system/wsgi-uxm.service
# Check that uxmapp folder is correct in params: WorkingDirectory, Environment and ExecStart
# sudo vi /etc/systemd/system/wsgi-uxm.service
echo "Starting uWSGI"
sudo systemctl enable wsgi-uxm
sudo systemctl restart wsgi-uxm
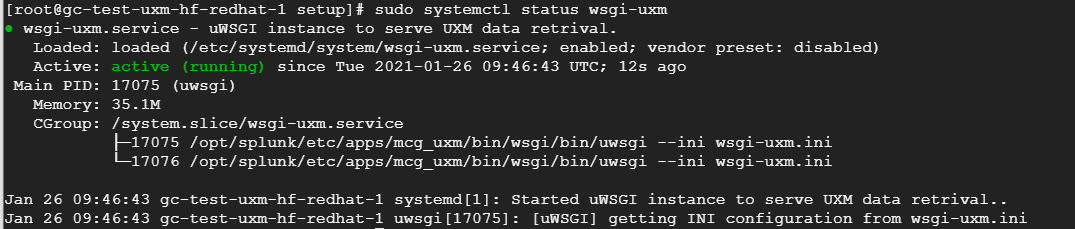
sudo systemctl status wsgi-uxm
After commands is executed systemctl status wsgi-uxm should show the following output:
Setup NGINX
NGINX is used to create web front for uWSGI data receiver.
We recommend for increased security that you setup HTTPs certificates or use an Reverse Proxy if data has to be received from outside the company network.
UXM Web agent also requires that valid HTTPs certificate is configured, because data is send directly from the users browser using the same HTTP/HTTPs security that monitored website has.
| Used for | Splunk endpoint | Reverse Proxy endpoint |
| Desktop/Robot agent data receiving | bin\task_mq_consumer_pcagent.py reads from RabbitMQ queue. | https://fqdn/data/pcagent |
| NGINX / uWSGI adds to RabbitMQ queue | ||
| Web agent data receiving | bin\task_mq_consumer_web.py reads from RabbitMQ queue. | https://fqdn/data/browser |
| NGINX / uWSGI adds to RabbitMQ queue | ||
Ubuntu prerequisites:
sudo apt-get install nginx-light
Redhat 7 prerequisites:
echo "Installing NGINX"
sudo yum install nginx
sudo usermod -a -G nginx splunk
Setup NGINX environment:
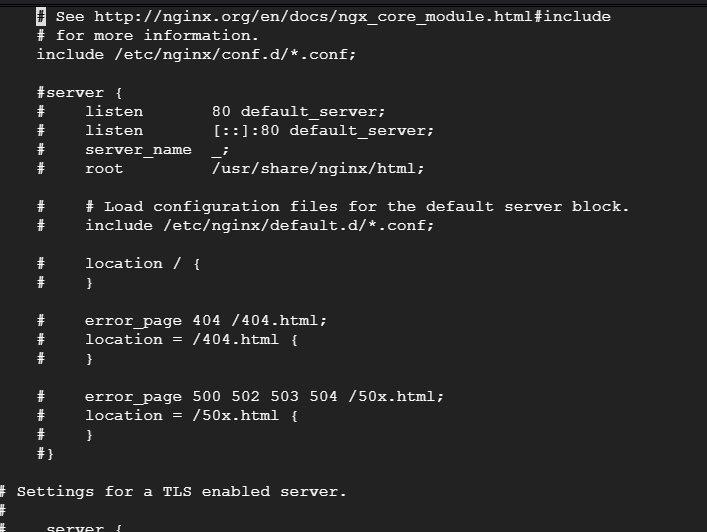
Edit /etc/nginx/sites-available/default or /etc/nginx/conf.d/default.conf depending on NGINX version and replace/add the content with the below:
# Disable access logging for /data/ receiving or setup rotating/deleting of log files, they can become very big.
map $request $loggable {
    ~\*/data/\* 0;
    default 1;
}
server {
    # Enable for HTTPs, remember to add certificates in bottom or generate them with certbot.
    # listen 443 ssl default\_server;
    listen 80 default\_server;
    server\_name  \_;
    server\_tokens off;
    # Disable access logging for /data/ receiving or setup rotating/deleting of log files, they can become very big.
    access\_log /var/log/nginx/access.log combined if=$loggable;
    # Set allowed SSL versions and ciphers.
    ssl\_protocols       TLSv1 TLSv1.1 TLSv1.2;
    ssl\_ciphers         HIGH:!aNULL:!MD5;
    # set client body size to 800 MB to allow Splunk POSTs to REST API and upload of apps.
    client\_max\_body\_size 800M;

    # Fix 414 Request-URI Too Large when splunk deep links into search from table.
    client\_header\_buffer\_size 64k;
    large\_client\_header\_buffers 4 64k;

    # Reverse proxy splunk from port 8000 to HTTPs port 443.
    # Note that NGINX and Splunk has to be running HTTPs as vel, or No cookies detected error could occur and login in Splunk fail.
    location / {
        proxy\_pass\_request\_headers on;
        proxy\_set\_header x-real-IP $remote\_addr;
        proxy\_set\_header x-forwarded-for $proxy\_add\_x\_forwarded\_for;
        proxy\_set\_header host $host;
        proxy\_pass https://localhost:8000/;
    }

    # Reverse proxy the Splunk REST API for Robot/Desktop Protobuf endpoint.
    location /data/pcagent {
        # Disable access logging or setup rotating/deleting of log files, they can become very big.
        access\_log off;
        include    uwsgi\_params;
        uwsgi\_pass unix:/run/uwsgi/wsgi-uxm.sock;
        limit\_except GET POST {
            deny all;
        }
    }

    # Reverse proxy the Splunk REST API for Web data endpoint.
    location /data/browser {
        # Disable access logging or setup rotating/deleting of log files, they can become very big.
        access\_log off;
        include    uwsgi\_params;
        uwsgi\_param HTTP\_X-Forwarded-For $proxy\_add\_x\_forwarded\_for;
        add\_header 'Access-Control-Allow-Origin' '\*';
        add\_header 'Access-Control-Allow-Methods' 'GET, POST, OPTIONS';
        add\_header 'Access-Control-Allow-Headers' 'origin, content-type, accept, LoginRequestCorrelationId';
        add\_header 'Content-Type' 'text/plain';
        uwsgi\_pass unix:/run/uwsgi/wsgi-uxm.sock;
        limit\_except GET POST OPTIONS {
            deny all;
        }
    }
    # Enable for HTTPs
    # SSL Certificates if Lets Encrypt isn't used.
    #ssl\_certificate /mnt/disks/data/certs/fqdn.crt;
    #ssl\_certificate\_key /mnt/disks/data/certs/fqdn.key;
}
Afterwards reload nginx config
sudo nginx -t && sudo systemctl start nginx && sudo nginx -s reload
Delete or comment out default website in /etc/nginx/nginx.conf if NGINX fails to start due to duplicate default server and rerun nginx reload.

Errors can be viewed in logfiles via:
sudo tail -n 100 -f /var/log/nginx/\*
NGINX can be tested by visiting FQDN/data/browser or IP/data/browser, UXM will output "no get/post data received" if NGINX/uWSGI works correctly.

Enable Splunk batch processing scripts
Enable scripts for UXM Web and UXM Desktop agent data processing if technologies are used.
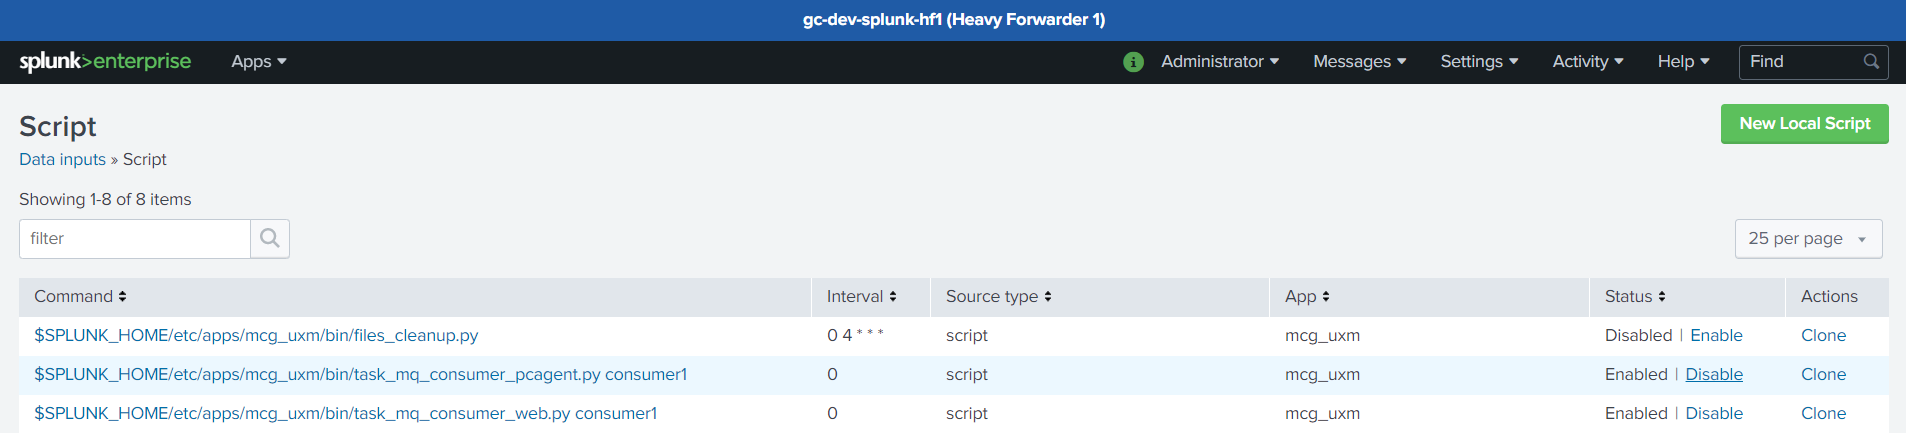
Goto Settings -> Data inputs -> Script and enable:
- "task_mq_consumer_pcagent.py consumer1"
- "task_mq_consumer_web.py consumer1"
Check for errors
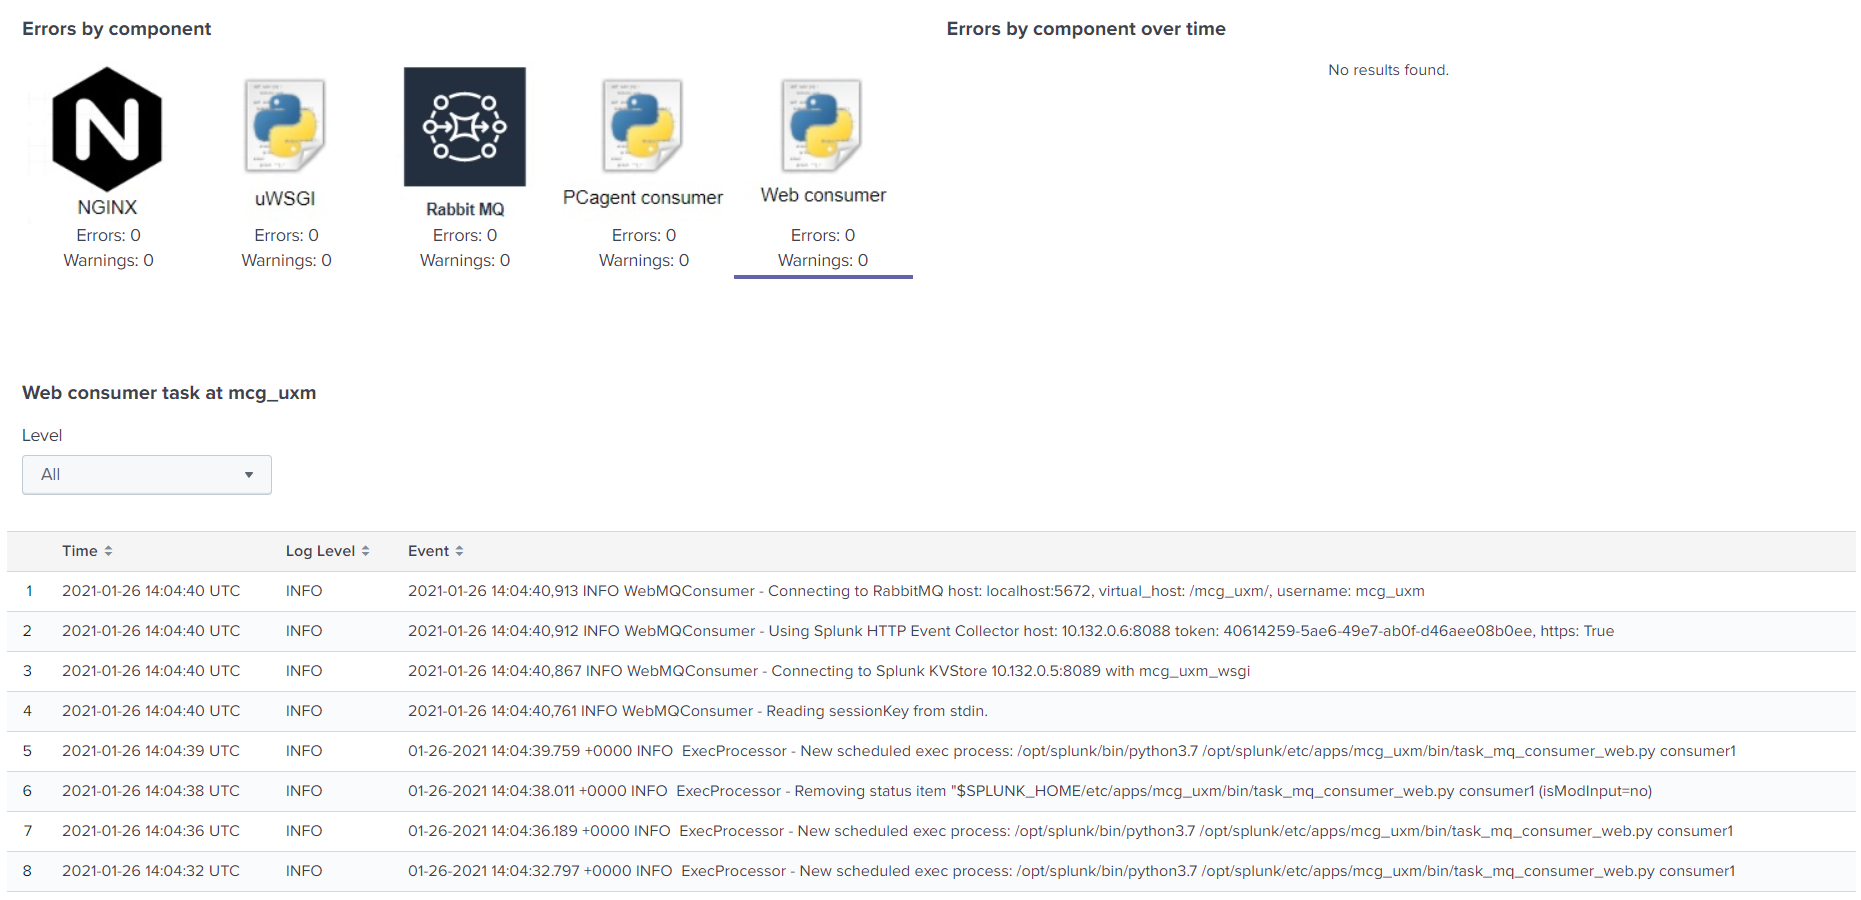
Open the UXM app on the Heavy Forwarder, the default dashboard will show status on installation and report any errors detected.
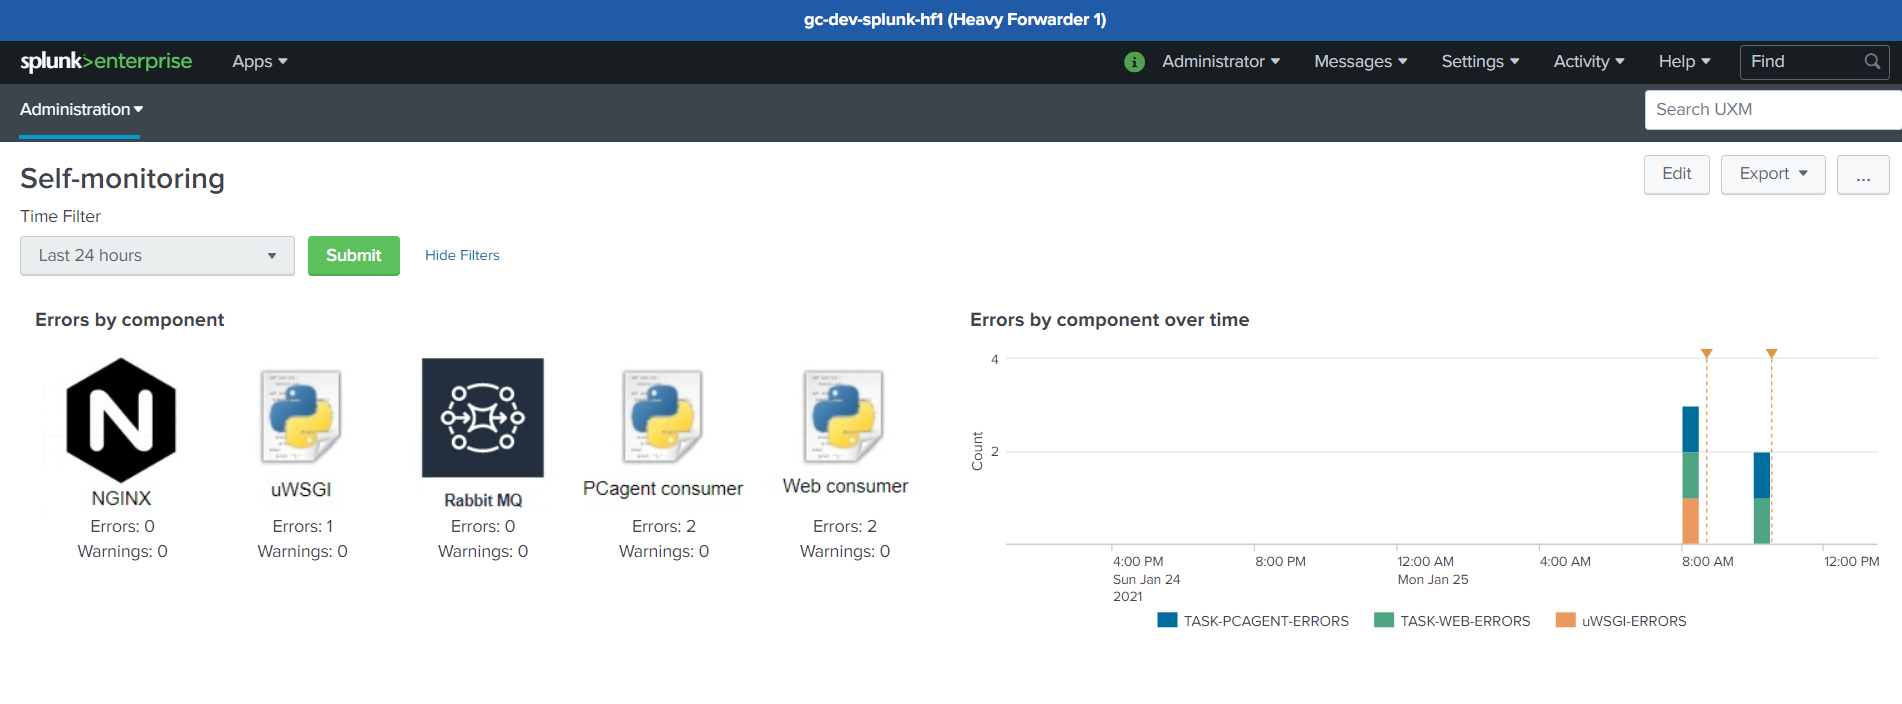
PCAgent and Web consumer will show following info if everything works: